Decorator’s Frosting Recipe…
simple and easy for any level of sweet treat maker.
Decorator’s Frosting Recipe…what’s not to like. I’m letting you in on my personal recipe for Basic Decorator’s Frosting. My mother is a retired Professional Cake Decorator….she was the go to for all the cakes and goodies growing up in my family. I remember barely, a clown cake when I was little and it’s probably one of the only cakes I remember for my birthday. However, I wasn’t your usual kid, I wanted Lemon Meringue Pie for my birthday dessert. And that was every year for a very long time. However, my best memories were from Argentia, Newfoundland, where my father was stationed and we lived for about 3 or 4 years. Up there, my mom ran a bakery out of the home on post and my sister and I would wake up to fresh smelling donuts almost every morning, or her decorating cakes for a Seabee Ball event and or sitting in the living room in the evenings while all sorts of ladies came over with cakes and learned how to decorate them because my mom was a Wilton Cake Instructor. It really was so much fun to watch. When we were bored or had little to do during the months where we were snowed in…which really happened a lot up there. Mom would sit my sister and I down at the table with cookie sheet pans and hand us bags of frostings and said…”have at it!” Boy did we. The cookie sheet and frosting bags were our coloring books and crayons. Once we squirted and squeezed out the frostings all over the pans and showed her our Picasso’s…she’d take the pans up, walk to the trash can and scrap all the frosting off into the trash, come back over to us and say…”have at it again.” And then the cycle started over again. Some of the best memories I have were around the table doing just that.
As I got older, my interest changed….a teenager’s life is always full. The closer I came to being an adult, I joined the ranks of the workforce, and my learned ability to decorate helped me out when I landed a job in a bakery at a grocery store. Well it was short lived because that store and about 60 sister stores with the same company closed. So I put it on hold and when I became a mom, I started doing those little cutesy things here and there. Well then it started becoming a habit and now…I’m full fledge on board with cake decorating and designing custom cakes and cupcakes and anything sweet.
Years ago, my mom gave me her Decorator’s Frosting Recipe, I have since filed it away, deep in the depths of my cookbook library. I’ve made plenty of recipes that were good, but after awhile, I just learned to wing it without a recipe until someone asked me if I’d share with them. Ya know, sometimes that’s hard to do when you eyeball your recipe all the time. Most decorator’s frosting is shortening based. As well as butter based. But for sturdy, easy and simple frosting that holds up to most temperatures and warm climate conditions…all-purpose shortening is the way to go. I’m all for a butter based recipe for some cakes but for what I do, butter doesn’t stand up to the job I need. Take a look at my photo examples of my frosting in action.

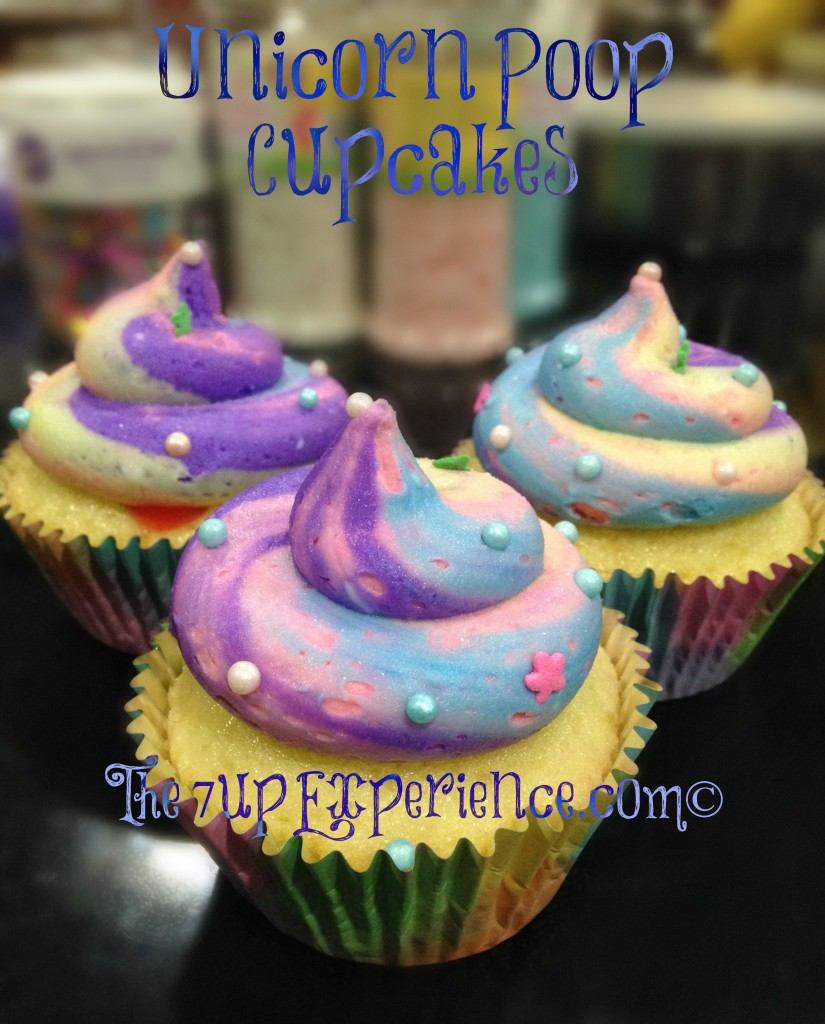
Sturdy, thick frosting that will stand up as you can see with the Unicorn Poop, after I’ve made several colors and swirled.
Notice, how thick and sturdy the Unicorn Poop is when using my Decorator’s Frosting Recipe and is standing straight up at the tip? It’s still very light and holds it’s shape in place without dropping.

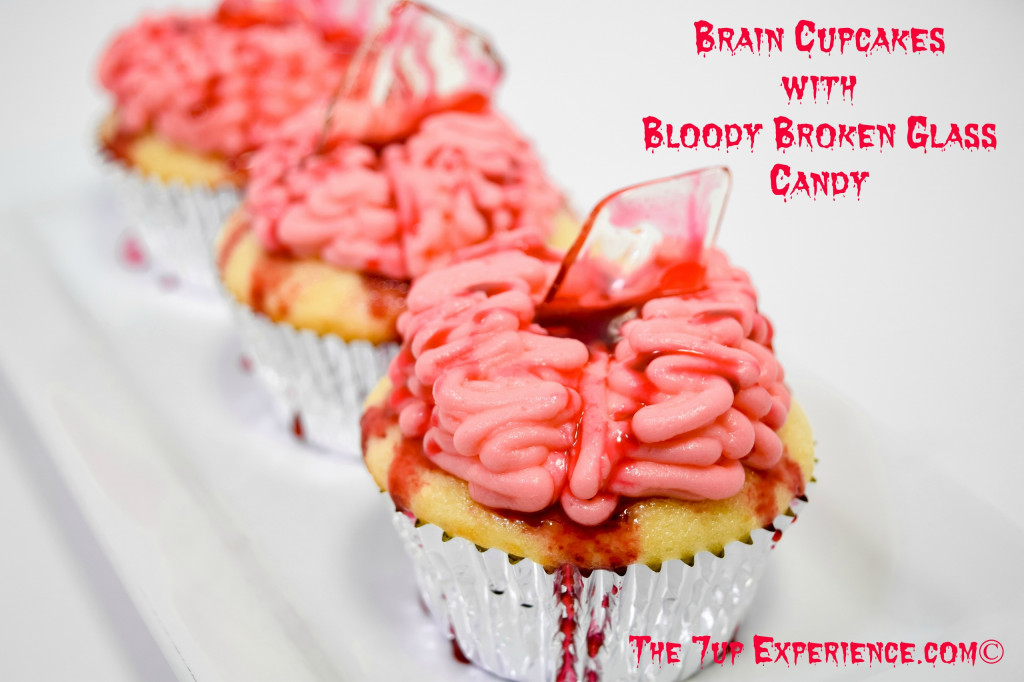
Bloody Broken Glass Brain Cupcakes using Basic Decorator’s Frosting Recipe by The 7up Experience.com
Now, do you notice difference in the Decorator’s Frosting Recipe with the Bloody Brain Cupcakes? Well not so much the blood part of the design but the brain part? See how soft it looks in the picture. That’s because for what I needed for this design style, I added a few extra TBSPs of milk, it still held it’s shape but wasn’t stiff or extremely sturdy as the above photo.
While both styles are extremely easy to do and I learned how to make these designs when a client requested these for her parties. Both however for the same client. She’s a great client and she has me busy for the next few months on several important holidays. I have to give Kudos and props to where ever the original idea came from for the Unicorn Poop (I think someone on Pinterest) and Brains because…they rock, now the broken glass part of the bloody brains came from a recipe on Allrecipes.com and you can find that recipe that I used for the Broken Glass Candy right here…NOTE: I only used the blood & glass candy in this recipe. However, for my girlfriend Lela…here’s my recipe. I hope you and others enjoy my simple, yet basic recipe. Note you can add coloring and different flavoring to suit what ever you are wanting. I’ve tried many flavors & baking emulsions. It’s just fun to change up the flavors to suit even a fudgy brownie or Blondie. Check my note below on how to make Chocolate Frosting.

- Decorator's Frosting Recipe
Ingredients
- 1 1/4 cup All purpose Shortening
- 3 lbs confectioners' sugar (powdered sugar)
- 1/4-1/3 cup milk or water (milk preferred)
- 1 TBSP Clear Vanilla Extract
Instructions
- In a large mixing bowl, using an electric mixer, cream the all-purpose shortening.
- Add the confectioners' sugar and beat on low speed of electric mixer.
- While the blender is mixing together the shortening & confectioner's sugar, slowly add milk or water, a few TBSPs at a time until you get the smooth consistency you are looking for.
- Add clear vanilla extract and blend well.
- Add your favorite colors and you are ready to decorate.
- ****Frosting side note: if you want a thicker frosting, add more confectioners' sugar 1/2 cup at a time until consistency is desired, but too thick won't be able to spread over a soft cake. If you want a thinner frosting, add more milk or water, but too thin won't hold form or shape to decorate with. The amount of milk varies on how sturdy or how loose your desire of the basic frosting you want. This part is more eye balled with the look and the texture of thickness.
- ***Flavoring Side Note: You can use regular and pure vanilla extracts, however it will take on a tint to your frosting. Fair warning as to that if you are wanting a pure white frosting. It's best to stick with a non colored vanilla extract. You also can utilize any flavor extract in prednisone this recipe. Play around with flavors. I've made strawberry, raspberry, banana, mint, etc. Orange is a favorite too.
- ***To make chocolate frosting, add 1/4- 3/4 cup of cocoa powder to this batch, start with 1/4 cup and add until you have the desired flavor you are seeking.


You must log in to post a comment.